Sunday, May 24, 2009

Lemon-Mint Tart

I never was a lemon person. Whenever I needed fresh citrus for cooking, I used limes. In fact, we could go months without ever buying a lemon. My taste buds must be changing, though, because I’ve started to appreciate the taste of lemon, particularly in sweet (but not too sweet!) incarnations.


The whipped cream tempers the tartness of the custard. The marionberry syrup, which I got at the farmers' market, gives this dessert a nice tang.

The local supermarket was having a special on lemons, 2 lb bags for $1.88. What a deal, huh? I picked up 3 bags. Mostly I’ve been making lemonade and refreshing cocktails, but Hubby suggested making a dessert. Never made a lemon tart before, so I thought I’d give that a try. I found a recipe on Food Network, courtesy of Francois Payard, that seemed pretty straightforward, but it wasn’t. I only blame myself for messing around with a recipe from a world-famous pattisier. However, everything worked out fine in the end and we all lived happily ever after, as you can tell from the picture.

Lemon-mint tart
adapted from Francois Payard’s recipe on Food Network
  • ½ cup packed mint leaves (stems okay too), roughly chopped
  • ½ cup fresh squeezed lemon juice (about 3 or 4 lemons)
  • zest from lemons
  • ½ cup granulated sugar (about 4 oz)
  • 4 to 5 eggs
  • 3 tbs unsalted butter, cut into chunks

Sweet tart dough
  • 1 cup + 1 tbs confectioners’ sugar
  • 1 ¾ cup all purpose flour
  • pinch salt
  • 9 tbs unsalted butter, softened
  • 1 large egg
In a mortar, grind the mint leaves with the lemon zest and a little of the sugar. When you get a rough paste, transfer it to a plastic or glass container. Add the lemon juice and the rest of the sugar. Mix well and allow the mixture to sit overnight in the fridge. This will help extract more of the mint flavor.

This dough recipe makes enough for two tarts, but the filling is only enough for one. Don’t ask me why; I’m just the chump who tried out the recipe. I used mini-tart pans and got 9 of them using half the dough. You may freeze the other half, well wrapped, for a couple of months or use it for another tart.

The easiest way to make the crust is with a food processor. Add all the ingredients, except the egg, and pulse until they are uniform. Add the egg and pulse just until the dough comes together. Turn out the dough. It will be sticky. REALLY, VERY, TOTALLY STICKY! I wish I would have known that in advance so I could adequately flour my counter. Divide the dough in half and wrap each half in plastic wrap and refrigerate for at least 1 hour. You definitely don’t want to skip this part. You want the dough to be chilled through when you roll it out, otherwise you will just have a terrible sticky mess. (Make sure you have plenty of flour handy when you roll out the dough because you’ll need to lightly sprinkle flour on after every couple of passes. And work fast because the dough warms up pretty quickly. It was a bit annoying since I’d never worked with such a sticky dough before, but well worth it.) Pre-bake the crust at 350F for about 8 to 10 minutes, or until the crust starts to turn golden. Don’t let it get too brown because you’ll be giving it another 10 minutes when the custard bakes.

The following day, strain the mixture into a glass or other non-reactive bowl. Don’t be alarmed if the mixture looks a bit murky. As you can see from my picture, it brightens up after adding the remaining ingredients. Add the eggs and beat well. Add the butter and set the bowl over a pot of simmering water, making sure the bottom of the bowl doesn’t touch the water. According to the original instructions, we’re supposed to whisk constantly until the butter melts and the mixture is smooth, but by that point my mixture was still quite thin and wasn’t really cooked. Luckily I have some experience making custard-based desserts, so I decided to continue cooking and whisking. As the mixture started to warm up, it did start to thicken a bit, but I was still afraid it would be too thin, so I added another egg. It thickened up quite quickly, but it may have done that if I just cooked it long enough. Basically it should be able to coat the back of a spoon. Set the mixture aside (off the water) to cool for a few minutes.

Pour the slightly cooled mixture into the pre-baked shell, and bake in a 325F oven (don’t go higher or the custard may curdle) just until the center sets, about 10 to 12 minutes. Cool on a rack, then in the fridge until completely chilled. Serve with whipped cream.

I'm submitting this to Weekend Wokking (before the deadline!), where the theme ingredient this month is, you guessed it, LEMONS! The host is Wandering Chopsticks. If you have a lemon recipe to submit, please send entries to wanderingchopsticks(at)gmail(dot)com by 11:59 May 31.

Wednesday, May 20, 2009

Regional Recipes Roud-up: Turkey!!

I think this was the best round of Regional Recipes yet. The participants did such a great job at showcasing the flavors and textures of Turkish cuisine. Every one of these submissions have been added to my must-try-soon list. I think you'll enjoy them too.

Hamsi Tava (crispy fried anchovies) submitted by Momgateway. I love anchovies in all forms, but fried anchovies are icing on the cake!


Cerez Tavugu (Circassian chicken) submitted by Mary of One Perfect Bite. Mary says Circassian chicken is like a western chicken salad, only more flavorful and nutritious. It’s a dish everyone should make at least once before they die. Now that's a strong endorsement!


Nohut salatasi (Turkish chickpea salad) submitted by Wandering Chopsticks. All our favorite ingredients—chickpeas, olives, onions, tomatoes—tossed with a zingy lemon dressing.


Lamb Kebab submitted by yours truly. Grilled lamb patties rolled in flatbread with a cool yogurt sauce. Hits the spot at 3AM after a night of merrymaking.


Hunkar Begendi (beef stew with eggplant puree) submitted by Joanne of Eats Well with Others. The surprise in this dish is the eggplant puree. It’s made by combining roasted, mashed eggplant with a smooth béchamel. That’s a new combination I’ll definitely be trying soon.


And last, but definitely not least, [eatingclub]vancouver showed their culinary prowess by submitting not one, but 5 dishes! Talk about Turkish extravaganza!

Let’s start with the borek with beef filling. Phyllo dough stuffed with ground beef and baked to a golden brown. They get bonus points for the beautiful, rustic presenation ☺


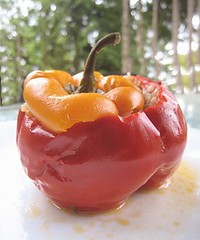
Etli biber dolmasi (stuffed peppers with groundmeat). A filling, familiar favorite.


Turkish bulgur kofte. Dense dumplings served with a garlicky yogurt sauce.


Mualle (eggplant and lentil stew with pomegranate molasses). Creamy eggplant, earthy lentils and a subtle punch courtesy of pomegranate molasses—an exotically delicious dish!


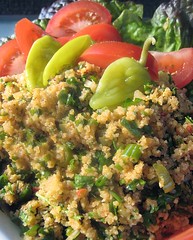
Kisir (Turkish bulgur tabbouleh). Take note guys, this is a dish that can cause a little excitement with the ladies.


Now aren't these submissions impressive? I hope you'll click through and check out the posts. You may learn something. I certainly did!

For our next region, I choose Korea!

Wandering Chopsticks will be hosting the next round. If you'd like to participate, please read the guidelines, then send submissions, with a photo, to wanderingchopsticks(at)gmail(dot)com. by June 15th.

Wednesday, May 13, 2009

Regional Recipes Turkey: Lamb Kebab

[eatingclub] vancouver has chosen Turkey as the spotlight region for this month's Regional Recipes, and while I’ve never been to Turkey (but it’s high on the list!) to experience the food firsthand, I did live in Denmark, which might be the 2nd best thing. Confused? Let me explain...

Many people may not know there is a sizeable Turkish immigrant population in Denmark (as well as other Western European countries). The first wave came over as guest workers during the labor shortage in the 60’s and decided to stay. The guest workers subsequently brought over their families, their religion, their customs and, of course, their food. Of all the things these guest workers brought with them, it’s the food that seems to have been absorbed most readily into Danish society.


Nothing says "eat me!" like a picture of a kebab sandwich in your face, except maybe a real kebab sandwich in your face.

The interesting thing about Turkish (and other Middle Eastern) cuisine in Denmark is that it’s usually offered as quick food—things like sharwarma or kebab—and it is very popular. In Copenhagen you didn’t have to look very hard for a sharwarma joint, even at 3 AM after a night of pub crawling (the best time to eat kebab IMO). Our favorite place was located on StrØget, the pedestrian shopping street. They boasted the best sharwarma in the city and that their secret was a spice combination consisting of an outlandish number of spices. The number that keeps coming to mind is 65, but that just can’t be right. Maybe the place is still there and still popular? I’ll have to try to squeeze in a visit the next trip to DK.

So what’s the difference between a sharwarma and a kebab? Honestly, I’m not really sure. I always thought sharwarma consisted of sliced meat that was compressed into a big hunk and slow cooked on a vertical spit. When you order, a little meat is shaved off, quickly browned then rolled in a flatbread with some dressing and maybe some tomato. Kebabs always bring to mind seasoned meat (chunks or minced) grilled on a skewer then rolled in flatbread or served with a rice pilaf. That’s just my understanding, but people seem to use the terms interchangeably, so how's a girl supposed to know? If you have any insight, do chime in!

Since I didn’t have an occasion or the equipment to slow cook a hunk of compressed lamb on a spit, I went for the easy route and made minced meat kebab sandwiches. Can’t really go wrong with anything comprised of well-seasoned minced meat on a stick, now can you? The only thing was missing the rinky-dink-hole-in-the-wall-everyone-around-me-is-half-drunk ambiance. You know how some things just taste better when eaten in a particular context? Going to have to figure out how to achieve that in my backyard.☺

Lamb kebabs
  • 1 pound ground lamb
  • 2 cloves garlic, finely chopped
  • 1 tsp paprika or cayenne
  • 1 tsp ground cumin or coriander
  • ½ tsp ground nutmeg or cinnamon
  • 1 to 2 tbs toasted sesame seeds
  • 1 tsp kosher salt (I use Diamond brand)
  • 1 egg beaten with 1 tbs all-purpose flour

Mix everything well, form onto skewers (pre-soaked if using wood), then grill until done. Can’t get much easier than that.

Serve with a nice rice pilaf and fresh sliced tomato and cucumber. Or in a flatbread of your choice with tomato and yogurt dressing (Greek-style yogurt + chopped fresh mint and/or cilantro, squeeze of lemon, finely chopped garlic and salt).


This is my submission to Regional Recipes. I'm hosting this month and will take submissions up until May 20th. Send them, along with a picture that is approximately 250x250 pix to blazinghotwok(at)gmail(dot)com.

Related posts you may enjoy:
Falafel

Wednesday, May 6, 2009

Green Papaya Salad with Chicken

Do you have a food that you eat the same way every time you have it? And the thought of trying it any other way just doesn't sound appealing? I'll admit, I'm guilty of this type of rigidity.


The thought of eating green papaya in any form other than som tom never sounded right to me. I know that other SE Asian cuisines use green papaya too, typically in a salad of some form or another. I know I'm going to get blasted by a certain someone whose initials are WC for saying this, but let's be honest, none of them compare to som tom.☺

But in the interest of exploration, I decided to try something different. Okay, maybe it's not that different. I didn't stir-fry it or anything. It's still a salad, but the flavors are quite different due to the addition of fresh herbs and chicken (or pork or shrimp). I was pleasantly surprised by how good it tasted and would definitely make this again.


As with any salad, there's no real recipe. It's all to taste. The only important thing here is to use green papaya and not the typical ripe papayas you can get at your local supermarket. If you've never had green papaya, you may expect it tastes sour like a green mango, but it's actually quite mild. The flesh is a bit rubbery yet still has a bite, a little bit like a carrot that's lost its crunch, which, now that I think about it, doesn't sound too appealing. Hard to describe. You'll just have to try it and see. For the herbs, I recommend mint and cilantro, and feel free to use as much as you like. My first choice of protein would be shrimp (either grilled or poached), but leftover shredded chicken or shredded roasted pork would be fine too.

Green papaya salad with chicken and fresh herbs:
serves 2
  • 1/2 medium-sized green papaya, shredded (about 2-3 cups)
  • cilantro and mint (about 1 to 2 tbs chopped of each)
  • handful dry-roasted peanuts, roughly chopped
  • cooked shrimp, shredded chicken or shredded roasted pork (about 1 cup)
  • 2 medium cloves garlic, chopped
  • 2 to 3 scallions, whites only, chopped
  • chilies, to taste, chopped
  • 1 large tomato, cut into wedges (or a generous handful sweet cherry tomatoes)
  • juice of 1 large lime
  • fish sauce to taste
  • sugar, to taste
  • 1/2 tbs finely chopped dried shrimp or 1/8 tsp fermented shrimp paste (optional)
If you've never handled a green papaya, here's a little explanation. It goes without saying, wash it first! Cut it in half and remove the seeds. I find it's easier to remove the skin with a paring knife rather than a vegetable peeler because the skin can be thick (like mango skin). To shred, I recommend using the Kiwi shredder with ridges (industry name= pro-slice wavy edged tool). Some genius Thai person invented it especially for this task (okay, I made that up, but it is made in Thailand). It makes quick work of the flesh and ensures the optimal thickness and length of the strands. You should be able to find it at your Asian market ($2.99 to $4.99) or order it online ($8.99 + shipping!).

Ideally you have a mortar and pestle so you can pound the garlic, chilies, scallions and tomato together to make a chunky "paste". If not, throw the garlic, chilies and scallions into your food processor and give them a good go around to chop them well. Add your tomatoes and pulse a couple of times. You don't want to make gazpacho; you should have a chunky paste. Remove your paste to a mixing bowl and add in the lime juice, fish sauce, sugar and shrimp paste to taste.

Last thing to do is to toss everything together. Adjust the seasonings one last time, then enjoy!

You know what? I actually have something to submit to Weekend Herb Blogging! Yay! I keep saying I'm going to submit, then I forget or something just comes up. The host this week is Mele Cotte.

Monday, May 4, 2009

Crispy Risotto Rice Cakes

Risotto is my Achilles’ heel. As much as I love rice, you'd think I'd be able to bang out a decent risotto, right?

Well, it's been known to happen, but I usually end up overcooking it. To make up for my shameful failures, I am pretty good at turning a bowl of leftover (sometimes mushy) risotto into crispy rice cakes.


Smoked salmon and peas risotto cakes served with a peppery mesclun dressed with a simple lemon-honey dressing.

These rice cakes couldn't be easier to make. Just take about 2 ½ to 3 cups cold, leftover risotto and add 1 egg to bind it all together. Form into paddies (they'll be sticky!) and drop them into a frying pan with enough oil for shallow frying. The trick to keeping the cakes from falling apart is to get a nice crust before flipping them. People have a tendency to want to move things around in the pan. If I've just described you, simply walk away as they are cooking. I gave my patties about 4 or 5 uninterrupted minutes on each side (over medium heat). Once they are done, remove them to a rack until you're ready to serve (or keep warm in a low oven if necessary).

Serve warm.


Related posts: Homemade smoked salmon

Saturday, May 2, 2009

Enjoying the fruits of my labor

For brunch we had creamy scrambled eggs with my DIY smoked salmon. The bread is a dense German-style rye I picked up at the PSU market from Fressen Artisan Bakery. It's a little bit dryer than the Danish-style rye we like, but still went beautifully with the creamy eggs.


While I'm here, I'll remind the other NE PDX'ers (not that they need reminding) that the Hollywood and the King farmers' markets kick off this weekend. I'm going to hit up the King market tomorrow to see what's available. That is, if Mother Nature doesn't decide to pummel us with another hellacious downpour!

Friday, May 1, 2009

Smoke 'em if you got 'em!

I know, I know. I'm corny but I really couldn’t help myself. Forgive me.

Anyhow, the weather here in Portland has started to warm up and I think Spring might actually be here. Today reached a comfortable 70F, and, more importantly, it was dry, which means I finally got the opportunity to use my new smoker*. I’ve been itching to smoke something, anything, but Mother Nature and I haven’t really been on the same schedule. I won’t even mention all the other distractions, which I like to lovingly call Real Life. Then everything just fell into place. I found myself with a whole Alaskan Sockeye, I had the time and Mother Nature was cooperating.


I used the brine recipe (scaled down for 2 pounds of fish) and smoke technique from Ed’s Kasilof Seafoods, for no other reason than that it looked easy. I’m pretty pleased with this first attempt. Even though there’s a lot of sugar in the brine, the result is not at all sweet, which is fine with me because I’m not a fan of salmon candy. If you’re looking for a sweeter flavor, you’ll need to play around with the salt-sugar ratio. I’m going to experiment a bit and see what interesting spice combinations I can come up with. Or maybe you have a favorite way to smoke salmon? Do share! I’m also hoping to share some of the ways I use smoked salmon in the next few posts, but I want to know how you enjoy it. Feel free to leave links to your favorite recipes in the comments.


*For those of you who have been following my gas vs. coal saga, I finally nixed the gas idea and bought a smoker instead. Technically it’s not new because I bought it at the end of the summer, but this is the first time I’ve used it for smoking, and I love it!